Setting up single sign-on (SSO) can be a confusing task. I’ve done it many times over the years with a number of SaaS providers and each one seems to be just a little bit different. In a previous post (Hands On: CloudEndure SharePoint Migration) I went through the basics of the CloudEndure console using just a username and password.
You may have multiple teams that need to do cloud migrations or for security and ease of management reasons you may want to tie the CloudEndure console credentials to your corporate identity store. The documentation on the CloudEndure site only lists instructions for configuring SAML with Microsoft ADFS, but in this example I will show how you configure the CloudEndure SAML configuration to Azure AD for SSO.
Prerequisites
This assumes that you have already registered with CloudEndure and you are able to log into the console with a username (email address) and password and you have sufficient permissions inside of Azure AD to register a new Enterprise Application.
Azure AD Initial Setup
As of the time of writing this post CloudEndure is not available in the Azure AD Application Gallery so we will need to set this up ourselves.
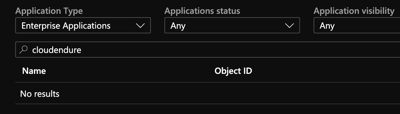
From the Enterprise Applications section under Azure Active Directory, we will “Add an Application” and choose a “Non-gallery application”
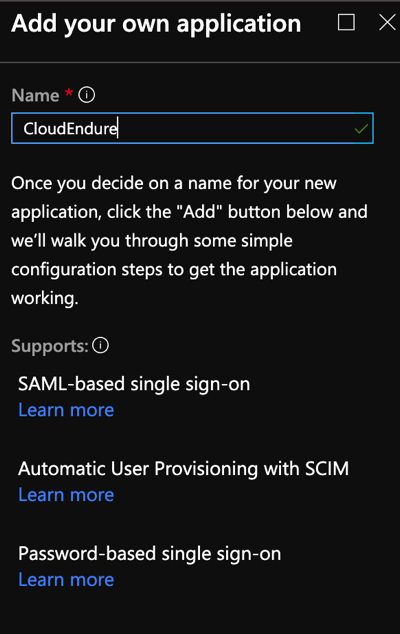
This will create the basic skeleton of our application.
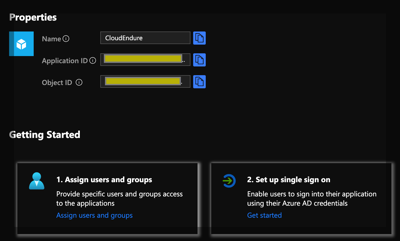
If you already have users or groups that you want to target the application to, you can specify them at this time. Most everything we need to do is found under the “Set up Single Sign On” section. In the CloudEndure console under the “Configure SAML” option, it will ask for three pieces of information. We can get this information from the “Single Sign On” properties page in Azure AD.
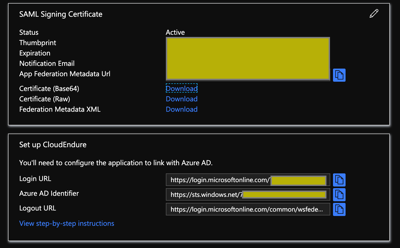
Make note of the “Login URL”, “Azure AD Identifier”, and download the “Federation Metadata XML” These are the only 3 pieces of information we need to configure the CloudEndure SAML configuration. We will come back to Azure AD and adjust a few more properties after we edit the configuration in CloudEndure.
CloudEndure Console Configuration
From the CloudEndure console in the upper right menu, choose the “Configure SAML Option”. This will bring up the following dialog:
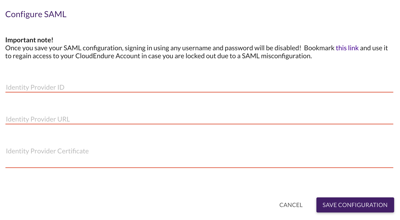
There is a hyperlink in the upper right of this dialog that says “Bookmark this link” It is very important that you do that otherwise you can lock yourself out of the CloudEndure account if your SAML configuration is off. (voice of experience).
The link will be in this format:
https://console.cloudendure.com/api/v5/accounts/<account guid>/access?username=<your email>
Make note of the CloudEndure account guid, you will need it back on the Azure AD side.
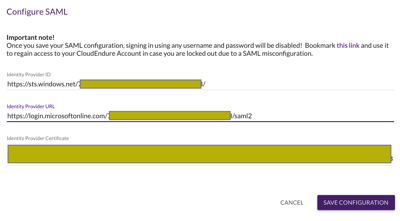
Now we just need to plug in the values we catptured earlier from Azure AD
Identity Provider ID : translates to Azure AD “Azure AD Identifier”
Identity Provider URL: translates to Azure AD “Login URL”
Identity Provider Certificate: copy/paste the contents of the Federation Metadata XML with everything between the <X509Certificate> and </X509Certificate> tags.
Save the configuration and there are few steps to finish up on the Azure AD side.
Azure AD Final Steps
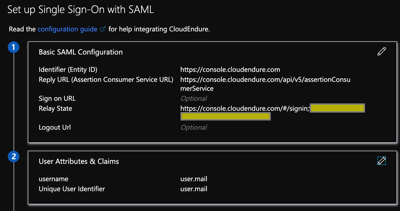
Under the “Single sign-on” parameter block:
Edit the following parameters under the “Basic SAML Configuration”:
Key: Identifier (Entity ID)
Value: https://console.cloudendure.com
Key: Reply URL (Assertion Consumer Service URL)
Value: https://console.cloudendure.com/api/v5/assertionConsumerService
Key: Relay State
Value: https://console.cloudendure.com/#/signin;<cloudendure account guid>
Edit the following parameters under the “User Attributes & Claims” section
Set the “Unique User Identifier” as the attribute that corresponds to the email you used when registering in the CloudEndure console. The attribute will depend on your directory it could be the user principal name or another attribute such as user.mail
Remove all other claims and add a “username” claim with the same value as above.
In the CloudEndure console select “Manage Users” to add additional users from your organization and determine the level of permissions that you wish to give them. At this point you can use either IdP initiated of SP intiated logon to access the CloudEndure console.
IdP initiated (from myapps.microsoft.com):
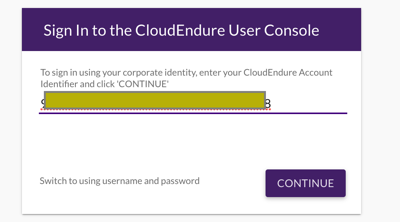
SP initiated (you will need to populate the dialog with your CloudEndure account guid):
Hope this helps. Cloud On!
“The cloud is an architect’s dream. Prior to the cloud if I screwed something up there was tangible evidence that had to be destroyed. Now it’s just a blip in the bill.” – Mike Spence
Hi michael,
Thanks for you post ! , I follow your step but when a try to login fron azure app I recieved the next error
bab Credentials
It’s possible see the logs in CloudEndure or azure?
Tranks again!
Yonathan –
I would check the Azure logs first. From the definition of the Azure application. Take a look at the Audit Logs and Sign-In Logs. They might offer a clue. Also make sure the user you are logged in with has access to the application both in Azure and the same user is defined in CloudEndure.