In this hands on series I take a spin with V3.1 of N2WS Backup & Recovery. You might ask, “Why do I need protection in the cloud, the cloud is already protected, right?”. One of my favorite quotes of all time:
Everything fails, all the time – Dr. Werner Vogels
As I architect cloud solutions, I always try to keep this tenet in mind. In many on-premises environments, an infrastructure group may shield application architects and developers from the underlying business continuity and disaster recovery concerns. Often when these applications are moved to the cloud in a “lift and shift” scenario, the administrators for these systems may have an inaccurate perception of their application resiliency.
No matter if you are running your applications in IaaS, PaaS, SaaS, or Alphabet Soup as Service bad things can happen to your servers or your data. Monthly patches have been known to brick many a server. As hard as it is to believe users can and will delete legitimate data. Bad guys are always looking to do bad things to your systems and data.
My goto solution for backup and recovery in the AWS space is N2WS Backup & Recovery. I have been using the product for many years and it has saved my proverbial rear end on more than one occasion. I wanted to highlight a few N2WS features that hopefully may be of some use to you.
- External Access
- Federated Access with Azure AD
- Thin Agent Deployment with GPO
- Cross Region Recovery Scenario
![]()
External Access
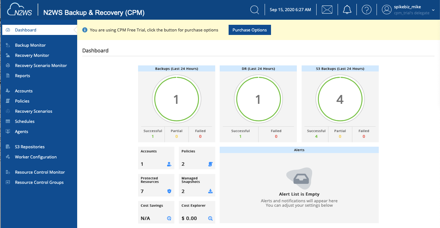
N2WS Backup & Recovery is available in the AWS Marketplace and there is a wealth of information at N2WS on how you subscribe to and spin up the the instance. The setup process is very straightforward. Once the instance N2WS is up and running, I need to configure access to the N2WS UI.
Beginning with a very simple AWS VPC design of public and private subnets spread across a couple of AZs, I like to put any application servers like N2WS into the private subnets and use an AWS ALB (Application Load Balancer) as a sort of reverse proxy to access these services. Multiple backend services can be published to a single ALB.
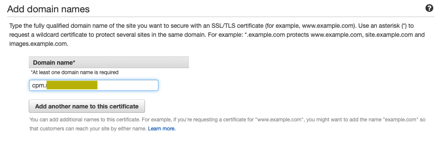
We can use AWS Certificate Services to manage the certificate for N2WS to avoid the self-signed certificate (or managing certificates at all) on the N2WS side. I’ll use this certificate in the configuration of the ALB later.
Create a target group that will point to the N2WS instance over HTTPS/443. Since the health check just points to the “/“ path, include 200 and 302 as success codes in the Advanced Health Check settings.

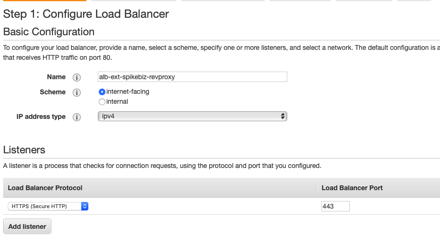
Now create an internet facing ALB since I want to be able to access N2WS from outside the VPC.
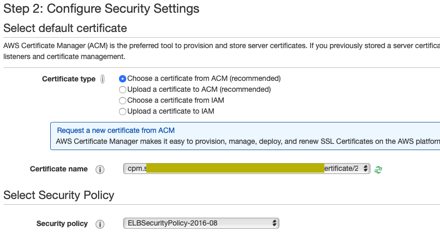
We will choose our certificate from ACM that we created earlier.
I would highly recommend creating your own ingress security group that restricts HTTPS/443 from a set of IPs that you wish to allow access to your N2WS instance from. Select that security group for the ALB. Configure routing to the target group that was just created.
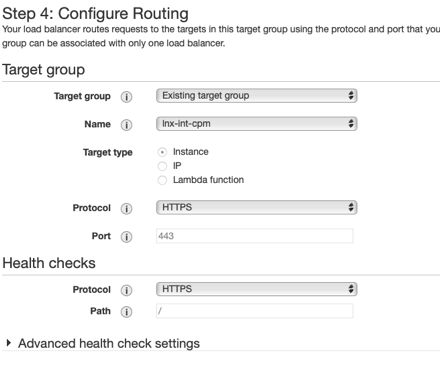
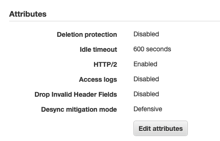
The default timeout on the ALB is 60 seconds. This can cause errors when you have long running processes on N2WS like File Level Recovery. I upped this to 5 minutes.
Configure a DNS record to point to the ALB and you should be able to access the N2WS UI with no certificate prompts.
Federated Access
It’s possible to just use local uid/pwd with N2WS, but if you have a larger team and want to distribute access, N2WS can be configured to allow federated access. In this example, I will use Azure AD as the Idp and show the relevant configuration on both the Azure AD and N2WS side.
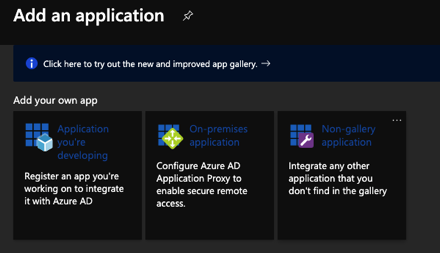
N2WS is not currently in the list of gallery applications within Azure AD (hint..N2WS) but it is fairly easy to add it. Add a “Non gallery application”.
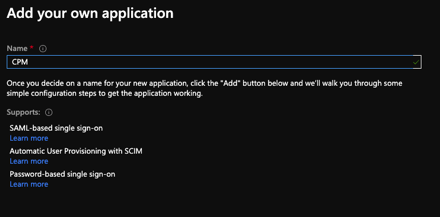
We will add our own application and use SAML-based single sign-on
This will generate some of the configuration items that we will need to plug into the N2WS side.
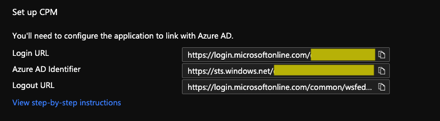
From the N2WS side under Server Settings, we will enable the the Identity Provider and plug in a few of the values.
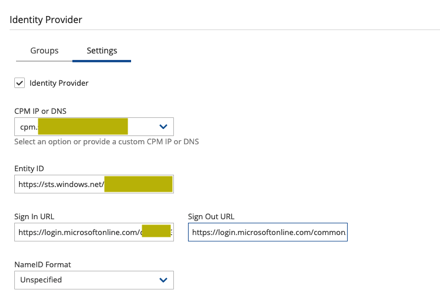
Working with these values:
- Plug in the DNS name created earlier for N2WS.
- Azure AD Identifier -> Entity ID
- Login URL -> Sign In URL
- Logout URL -> Sign Out URL
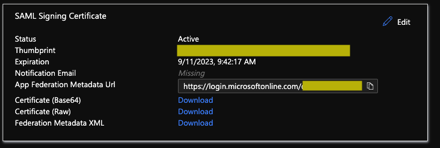
- Download the Certificate (Base64) -> x509 Certificate
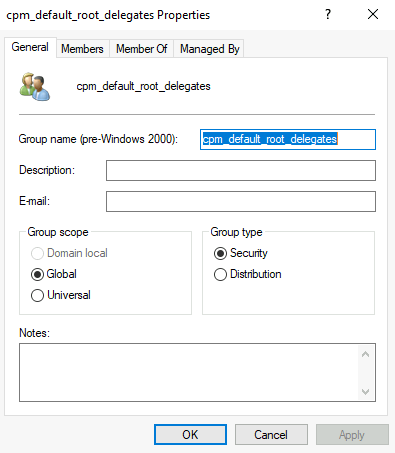
Once the Identity Provider is enabled on the N2WS side, you will the following groups on the N2WS server.
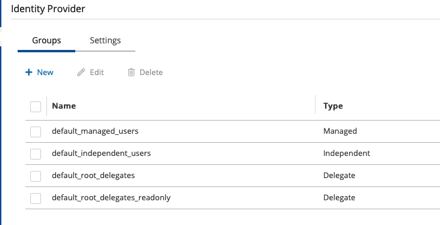
You can create your own groups or use the default built-in groups. For my purposes, I just want delegated access to the root user, so I will use the default_root_delegates group. Within local active directory, I created the following group: cpm_default_root_delegates.
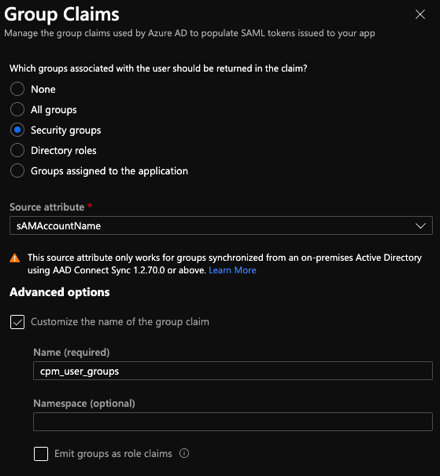
From the Azure AD side, I need to specify at least the following claims:
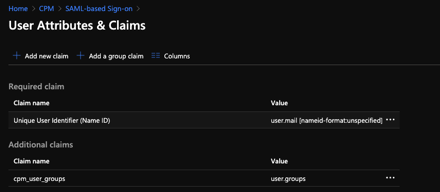
Be sure to set the name identifier format as “Unspecified”. For the “cpm_user_groups” claim, I use the sAMAccountName as the source attribute.
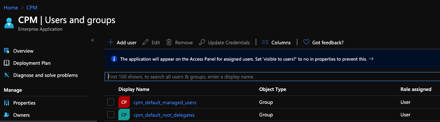
Once the AD group has synchronized into Azure AD, this group will be assigned with permissions to the application.
We can now launch N2WS from the “myapplications.microsoft.com” page.
If all is well, you should log straight into N2WS and in my case as a delegate to the root user.
Thin Backup Agent Deployment
N2WS includes a thin backup agent for use with Windows instances. There are many different ways to distribute the agent, but the agent is fairly lightweight so I use GPO to deploy it.
The basic steps are to:
- Download the N2WS Thin Agent MSI.
- Load the ORCA Tool from Microsoft.
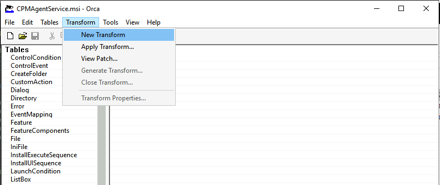
- Open the N2WS Agent MSI file and create a transform that includes the N2WS server name.
- Create a software deployment GPO that includes the MSI and Transform
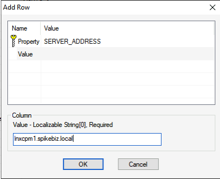
Once you open the MSI file with Orca create a new transform.
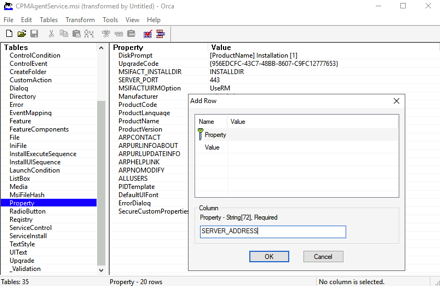
From the Properties section – Add Row with a property of SERVER_ADDRESS with a value of the local N2WS server name.
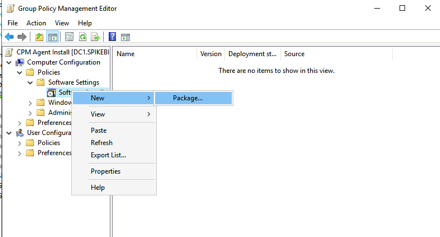
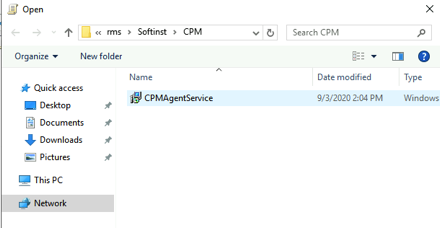
Copy both the MSI and Transform file to a network accessible location. We will then create a new GPO to distribute our package. From Computer Configuration -> Policies -> Software Settings we will add a new package.
Select the MSI file from our distrubtion point and under the Modifications section of our N2WS agent install select our Transform file.
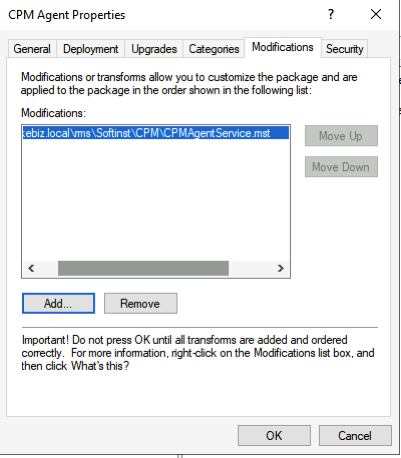
Link the GPO to the appropriate OUs and on next system boot, you should see the CPM agent install on the machine.
Cross Region Recovery Scenario
It is often said that anyone can backup but the real test is can you recover.
Wise are those who backup, for their data will be safe in the day of trouble. Even though they face the blue screen of death, they shall fear no evil. – T.E. Ronneberg
N2WS has a multitude of recovery options everything from simple file level recovery, volume recovery, to full instance recovery. There are more options than I could possibly do justice to in this blog post, but there is one particular recovery I wanted to highlight. In the spirit of disaster indifference, what if I need to recover a whole environment perhaps to another region?
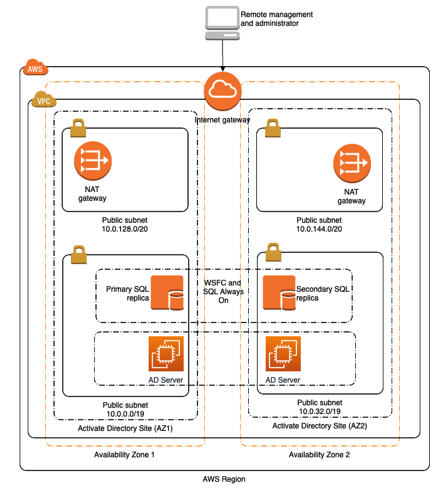
For testing purposes, I have a VPC and a set of resources shown in the diagram below. It is fairly simple with a public/private set of subnets that contain Microsoft SQL server and Active Directory components running in the us-west-2 region.
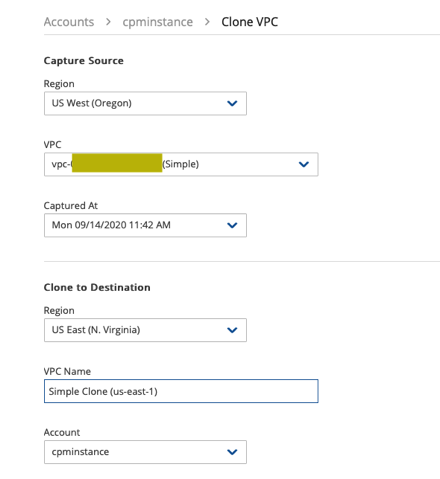
I’m going to use N2WS to clone this VPC to us-east-1.
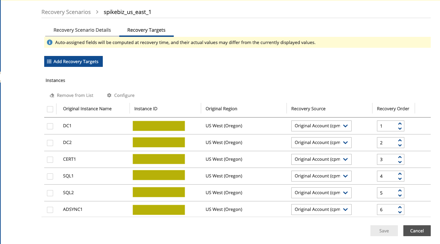
I’ve created a recovery scenario that includes the components I need and a recovery order. I need to recover the domain controllers first followed by the SQL servers and then the rest of the application servers.
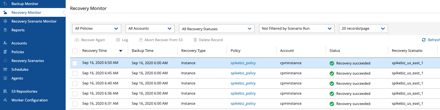
We can follow progress in the Recovery monitor section:
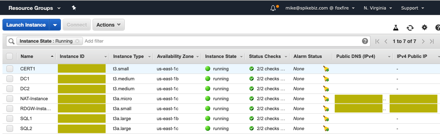
Here is my environment now running in us-east-1
There are a ton of options for recovery, but the main point is that you can recover!!
“The cloud is an architect’s dream. Prior to the cloud if I screwed something up there was tangible evidence that had to be destroyed. Now it’s just a blip in the bill.” – Mike Spence
Cloud On!